Getting Started
Congratulations!
You’re the proud owner of a new Moonlander. Thank you for picking our keyboard! If you’ve only ever used traditional keyboards, this tool can seem a bit intimidating, but don’t worry: This guide will take you through everything you need to start your journey towards a more ergonomic writing experience.
Remember, this is a journey — a typing adventure if you will. You’ve been typing with staggered, old-style keyboards for years; you’ll quickly notice your bad habits when starting with a Moonlander. Don’t fret: With this guide and practice, you’ll be able to regain your typing speed and enjoy a keyboard that’s perfectly customized for your individual needs. Soon you’ll be left wondering why this isn't the standard layout!
Think of this guide like a lunar flight checklist. Many steps, but in the end, a brand-new feeling awaits. Take your time and work through the steps in sequence — that way you'll get the most out of your new Moonlander. 3, 2, 1, blastoff!

What’s in the box?
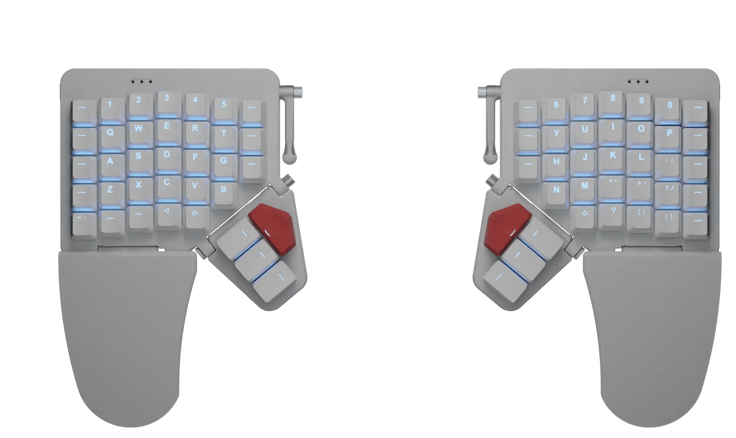
- Keyboard: Both halves, with the Wing wrist rest attached.
- 3.5mm TRRS cable: Goes between the halves of the board. TRRS stands for tip-ring-ring-sleeve (the connector type) and can be replaced with any other TRRS cable up to 6ft (2m) long if you want to customize or extend it.
- USB Type-C cable: Use this to plug the keyboard in. It also has a USB-A dongle on the end, in case you need it.
- Key puller: Use it to remove keycaps and keyswitches, to customize your board over time.
- Extra keycaps: Decide if you want the bump on the F and J keys, or if you want the label on the bottom left key.
- Hex key: Use it to loosen the screw on the thumb cluster before you adjust its angle, then tighten it back down.
- Carrying case: Use it folded for a compact (and thicker) footprint, or place it in your backpack unfolded, for a flatter distribution.
Or, here‘s a video that goes over what‘s in the box in greater detail:
Connecting the keyboard
Connecting the keyboard is simple. First, connect the halves using the 3.5mm TRRS cable. Then plug the USB cable into the keyboard’s left half, and connect it to your computer.
When you connect everything up, the status LEDs on the board should light up in a ripple effect to show that the keyboard is connected.
Operating system setup
If you’re running Windows or Linux, just plug the keyboard in and go. On macOS, there are a couple of steps to go through.
When you want to connect the keyboard for flashing or training, if you're on Windows or Linux, a little extra setup is required, detailed below.

Positioning your keyboard
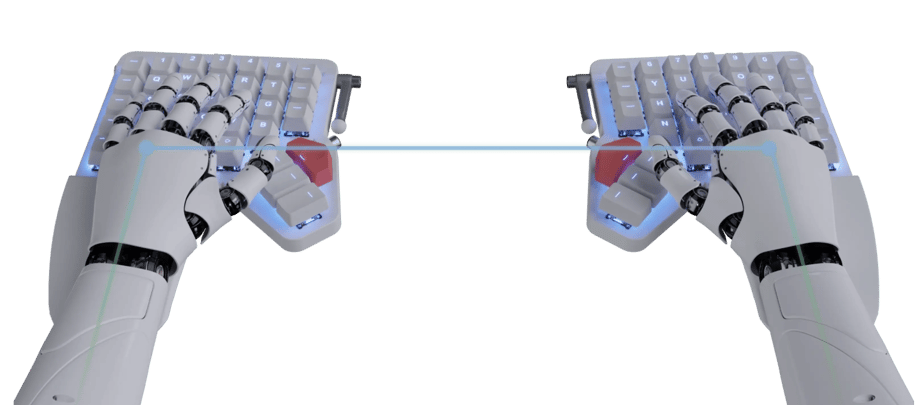
You want to avoid having the two pieces too close to each other: Don’t replicate what you do with your normal keyboard. Instead, we recommend that you begin by placing the two pieces at shoulder width, ensuring that the home row aligns with your fingers. Your posture should be completely relaxed — just extend your arms naturally at shoulder width, note where your hands fall, and put the keyboard there. Let the board come to you, not the other way around.
Note the angle of rotation of both halves relative to your body. They don’t have to be straight — you can angle them outwards slightly, so that your wrist does not have to flex in any direction at all.
At this point, without typing, your position should feel completely relaxed and natural. You’re just laying your hands on the desk in a very comfortable way… and there happens to be a keyboard right under your fingers.
Pro tip: Start flat. Yes, the Moonlander has an exciting tilting system. It's fun to use. And yet, when you start with the board, our advice is to spend at least a month with the board completely flat. This allows you to experiment with layouts and get used to the ergonomics of the board. The board is extremely comfortable flat, and using it like this reduces the initial learning curve (which is quite steep, as it is). So, one less thing to worry about. Just use it flat for a month.
When it's time: How to tent your board
Important note on screw directions:
- The right side tightens right. Turn it left to loosen.
- The left side tightens left. Turn it right to loosen.
This is so the thumb cluster doesn‘t come loose when you place weight on it.
The legs act as you‘d expect. Both sides are righty-tighty, lefty-loosey.
The legs need to be fully loosened before trying to adjust, if you leave the legs tight and then move them, you may grind down the leg "nubs" and damage them.
If you'd like, you can now tent the unit by adjusting the angle of the thumb cluster and the support leg. The wrist rest will self-adjust to lie against the table, no matter the angle. You don't need to choose the exact same angle for both hands — one can be more extreme than the other.
Starting to type
Now that you have your Moonlander in place, it’s time to start typing!
Your keyboard comes preloaded with the default layout shown below. Watch a video of the tour below.
Explore on your own or start a guided tour by clicking the Tour this layout button above the layout!
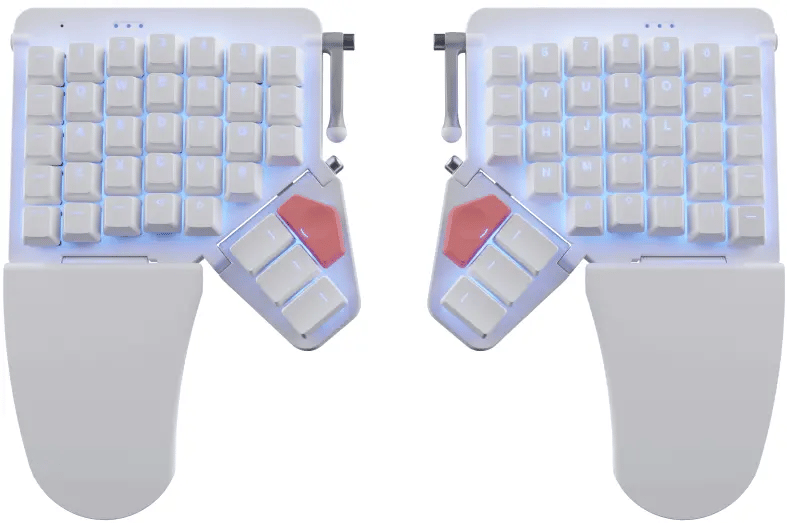
Make it pretty, turn on the lights!
You can turn on the LED Lighting of your keyboard by pressing the lighting toggle switch located on Layer 1 (if using the default layout). Here’s a quick GIF:
There are two ways to control the lights on your Moonlander: Manually, or automatically per key/layer.
All of this is configurable through Oryx, but we do recommend you familiarize yourself with a few of terms used in our detailed blog post.
More control!
(Customizing the firmware)
Your Moonlander requires no software to work. All the customization is done on your board, at the firmware level. This means that nothing you do here will burden your machine, and it’s all cross-platform and portable. Just plug your keyboard into any random computer, and your familiar custom layout is right there, zero installation needed.
The layout that comes pre-loaded on your unit is not perfect for you — it can’t be, because in ergonomics, one size does not fit all. It’s time to unleash the power of the Moonlander and truly make it your own.
Before we get started on the firmware side of things, take some time to learn some terms we use in configuring your board.
There are two ways to save your layout to your keyboard:
With our native app (called Keymapp), or right from Chrome. You can’t use Firefox because of Firefox’s own limitations, not because we don’t like it (we do).
You can use either Keymapp or Chrome.
Here’s how you do it with Keymapp.
Here’s how you do it with Chrome.
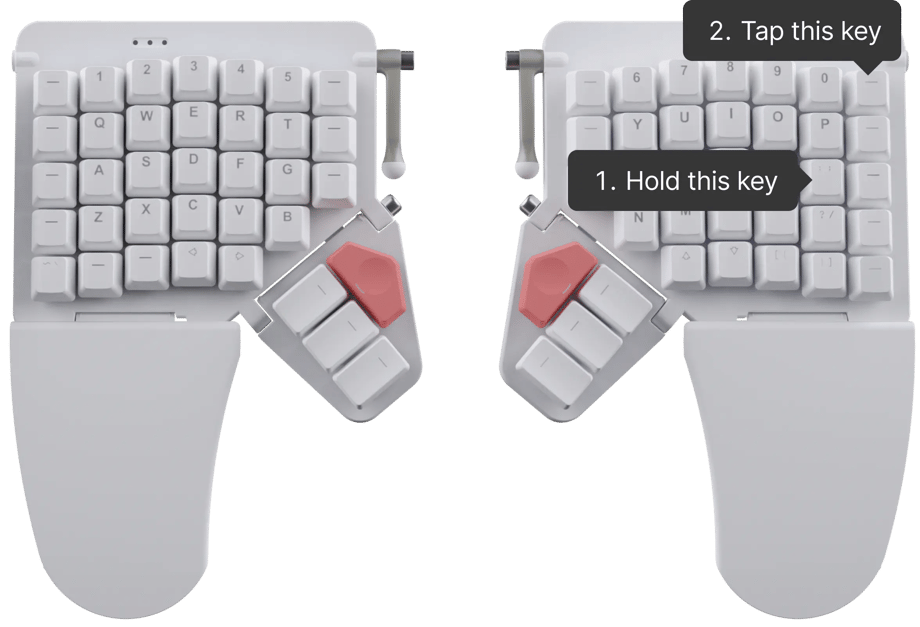
 Reset Key
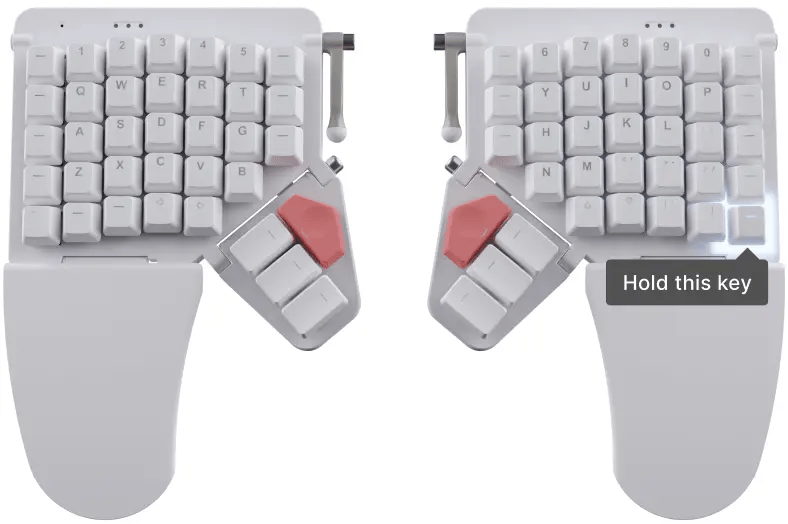
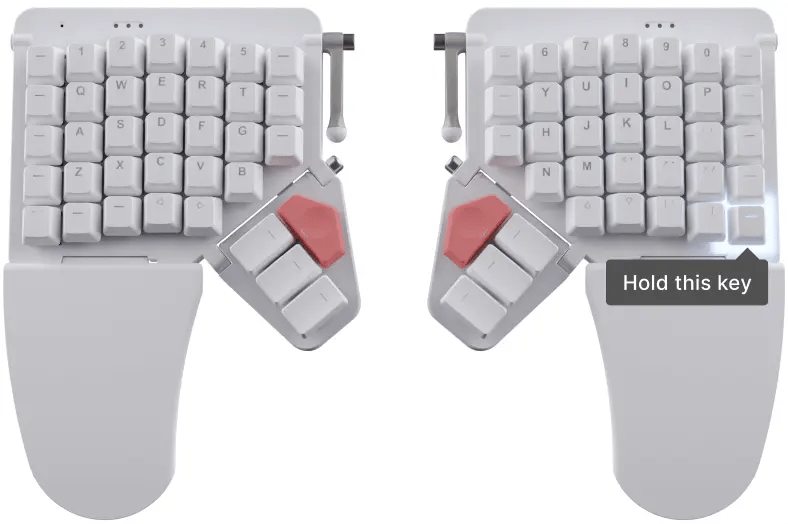
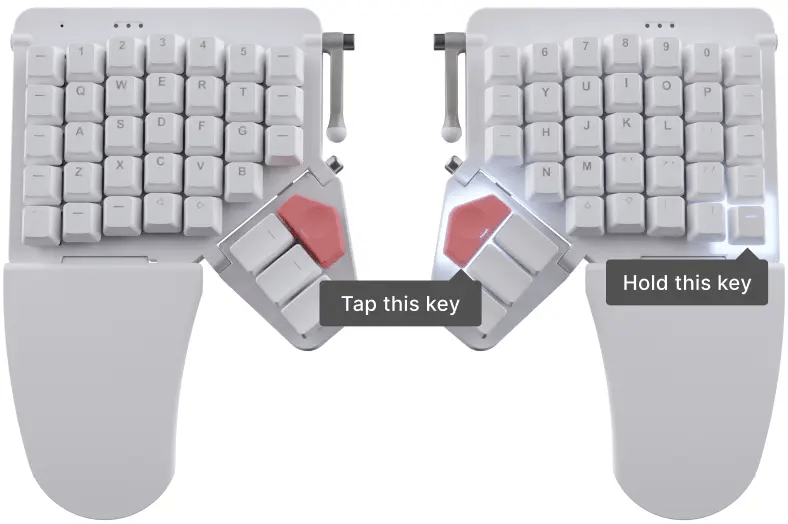
When flashing, you’ll be prompted to use a paperclip to press the reset button. You can do this, but if you don't have a paperclip, we also have a Reset key in Oryx that does the same thing. On the default layout, press these two keys.
Customizing in code: Working with the underlying firmware
The firmware running on the Moonlander is the Quantum Mechanical Keyboard Firmware (or QMK, for short), which we actively support. It’s a third-party open-source project running on multiple keyboards, with over 300 contributors and thousands of forks.
If you enjoy working directly with the code driving the keyboard, you can dig right into QMK on GitHub, compile it locally, and customize your keyboard at the deepest levels possible. This is a good starting point — QMK is extensively documented.
Take the Oryx onboarding tourMaster your layout
One of the best ways to get started with your new keyboard is to use the connect feature in our typing trainer, typ.ing. This feature shows your keymap dynamically on your screen, in real-time, including all layer changes. Here’s how it works:
This is one of the first things you should try with your new keyboard, especially as you follow along the next section on typing.
Practice, practice, practice
Remember. You’re relearning how to type, so it’s going to take some time before you get back to your normal typing speeds. It might be frustrating at first, but with practice, you’ll improve.
If this is your first serious ergonomic keyboard, you’re going to find yourself discovering some of those bad habits you acquired with your old keyboard. That’s okay, you’ll get there! Just keep on practicing until you’re back to your normal speeds.
We recommend training daily for the first three weeks, using the typing lessons from typ.ing.
Making this a daily habit over the first few weeks will help you tremendously.
There are also some third-party options you could try out:
For regular typing practice, we recommend KeyHero.com.
For coding typing practice, we recommend typing.io. It lets you work with real code in several languages, so you get to practice parentheses and curlies, etc.
For focusing on the exact keys that need work, check out keybr, a typing tutor that dynamically generates lessons matching your skills.
Finally, an interesting premium service in this space is Typing Club. It has a nice interface, and offers a placement test to asses your initial level.
If you’ve been typing for years, suddenly practicing it may feel awkward at first. It’s all good — deliberate practice is an important thing and it will help you improve rapidly.
What does this button do?
“What does this button do?” — with Keymapp, you never have to wonder.
Keymapp allows you to view your keyboard's layout right on your screen, in real-time. When you switch a layer, Keymapp shows you the keys active on this layer.
 Find out more about Keymapp
Changing your keyswitches

Use the right tool for the job
Your keyboard comes with a double-sided key puller, designed to make it easy and safe to pull out both keycaps and the keyswitches that lie under them. Before you begin, make sure you have this key puller on hand.

Make sure your Moonlander is flat
If you typically tent your Moonlander, use the included hex key to loosen the thumb cluster tenting screw and the leg. Lay the keyboard completely flat on your desk before proceeding, as you will be applying moderate pressure to the unit in some of the following steps.
Pull out the keycaps
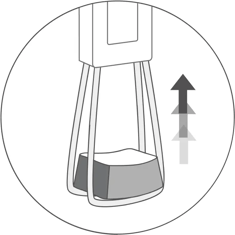
First, you’re going to have to pull out your keycaps. Use the “wire loop” side of the key puller for this. Place the puller over the keycap and push down. The wires will part and “hug” the keycap from below. Pull directly up, gently but firmly.

Grasping a keyswitch correctly
Now comes the fun part. Here, orientation matters: Insert the tweezers under the switch where you see the little tabs.
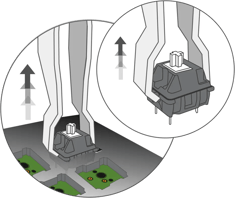
Pulling it out
Squeeze the tweezers around the switch and pull up with a smooth upward motion. The keyswitch will come out - victory!
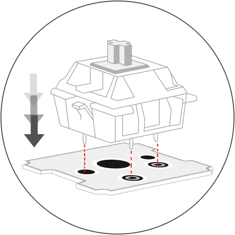
Inserting a new switch
Once you have your switch out, you’ll see the socket. Before you insert the new switch in, make sure its pins are straight and that it’s correctly oriented. Then, simply push straight down, and the switch will click into place.

You’ve got it!
Repeat for as many keys as you‘d like. Then, bask in the satisfaction of a job well done: You just did something most mechanical keyboard owners can‘t.
Graduation! You’re ready to fly!
You made it to the end of our Getting Started tutorial! Woo!
The Moonlander is a “journey keyboard” – so while this is the end, it is also a beginning. Your layout will keep changing over the months and years you'll spend with your board. Rapid change at first, and then the occasional tweak here and there as your workflows and projects change over time.
And remember: We are always just an email away. Write us at contact@zsa.io — Robin, Nick, Mike, and Erez would love to hear from you.